
How I Built My Own ChatGPT Plus [A Beginner’s Guide]
This could be your first beginner-friendly LLM project.

![How I Built My Own ChatGPT Plus [A Beginner’s Guide]](https://images.unsplash.com/photo-1674027444485-cec3da58eef4?crop=entropy&cs=tinysrgb&fit=max&fm=jpg&ixid=M3wxMTc3M3wwfDF8c2VhcmNofDl8fGNoYXRncHQlMjBncm93dGlrYXxlbnwwfHx8fDE3NDE0NTgzMzN8MA&ixlib=rb-4.0.3&q=80&w=2000)
If you’ve been wanting to start working with large language models (LLMs), this tutorial will be a great place to start.
It’s designed to be approachable so that it won’t overwhelm you, but it still gives you a taste of what it’s like to work with LLMs.
Going hands-on with my LLM learning from the past year, I decided to build a ChatGPT-like app for myself (cost-effective against ChatGPT Plus) and add it to my portfolio of projects.
Here’s a quick sneak peek of what we’ll build:
Let’s get our hands dirty building our own ChatGPT.
Step 01: Creating the OpenAI API (GPT-4o)
Before coding, we need access to OpenAI’s GPT-4o model via their API. If OpenAI releases a newer model, you can simply make minor changes to the code and use the same API key.
Here’s how you can get your API key:
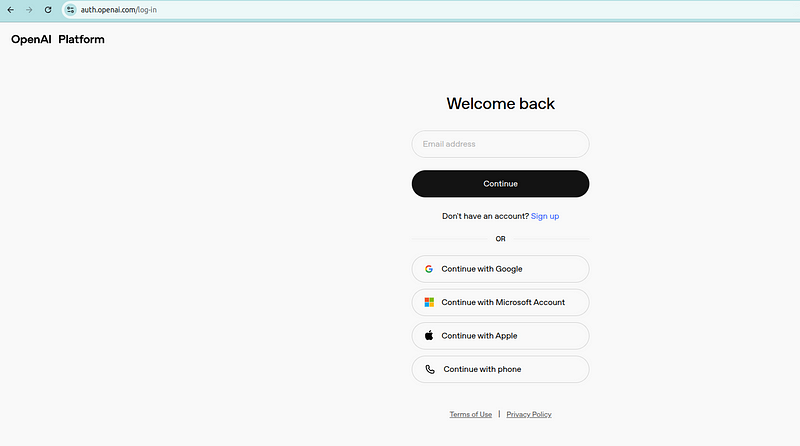
- Sign Up or Log In: Go to OpenAI’s Platform website and create an account or log in if you already have one.
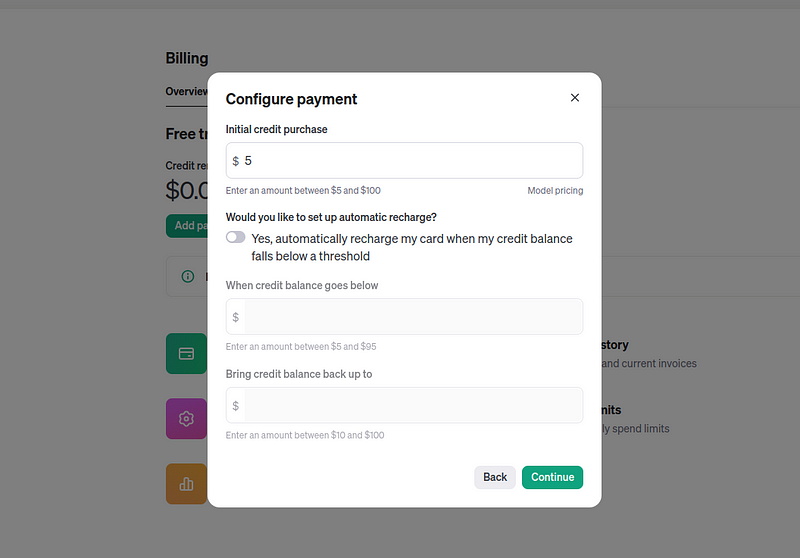
- Top Up Your Account: You’d be required to top up a minimum of $5 to start using the API. You can do this in the Billing section. Don’t worry — you’d hardly use a few cents to develop and test the application.
- Navigate to API Keys: Once logged in, go to the API section and click on “API Keys.”
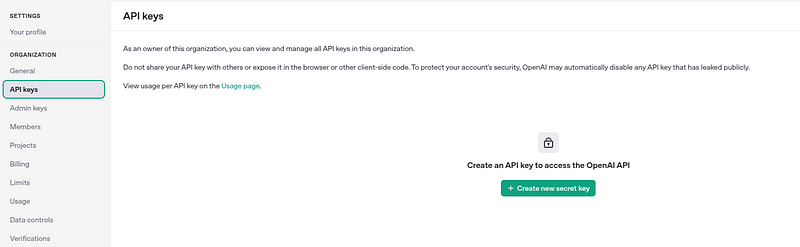
- Create a New Key: Click on “Create new secret key.” Name it (e.g., “My ChatGPT Project”) and copy the key. This key will only be shown once, so make sure to save it securely.
Now that we have the OpenAI API key, let’s move on to building the chat-like web application.
Step 02: Building the Web App using Streamlit
We aim to create a simple chat interface with an input box, similar to ChatGPT. While ChatGPT has advanced features like chat history and memory management, we’ll keep our app minimal for this beginner-friendly project.
Streamlit is a fantastic tool for building interactive web applications with minimal effort that has been around for a few years.
I’ve written extensively about it (see here), but mainly from a traditional ML perspective. This guide will be somewhat different, utilizing chat elements better suited for LLM applications. All codes written in this article are present in the accompanying Github repository.
Let’s build it.
1. Set Up the Basic Skeleton
First, let’s create the app's basic structure. We’ll use Streamlit to create a simple web interface.
import streamlit as st

# Set up the app title
st.title("My Custom ChatGPT Plus")

# Initialize session state for messages
if "messages" not in st.session_state:
    st.session_state.messages = []

# Displaying previous messages
for message in st.session_state.messages:
    with st.chat_message(message["role"]):
        st.markdown(message["content"])

# Add a chat input box
if prompt := st.chat_input("Please enter your query here..."):
    st.session_state.messages.append({"role": "user", "content": prompt})
    with st.chat_message("user"):
        st.markdown(prompt)
What’s happening here?
- We’ve set up a basic Streamlit app with a title using
st.title() - We’re using
st.session_stateto store chat messages so they persist across interactions. - The
st.chat_inputfunction creates an input box where users can type their queries. - For now, the app only displays user messages. We’ll add the assistant’s response in the next step.
You can also refer to the Streamlit documentation to understand various elements present in the library.
2. Add the OpenAI API Integration
Now, let’s integrate the OpenAI API to generate responses to user queries.
from openai import OpenAI
import streamlit as st

# Set up the app title
st.title("My Custom ChatGPT Plus")

# Initializing a session state for the OpenAI model and messages
if "openai_model" not in st.session_state:
    st.session_state["openai_model"] = "gpt-4"

if "messages" not in st.session_state:
    st.session_state.messages = []

# Displaying previous messages
for message in st.session_state.messages:
    with st.chat_message(message["role"]):
        st.markdown(message["content"])

# Chat input box
if prompt := st.chat_input("Please enter your query here..."):
    st.session_state.messages.append({"role": "user", "content": prompt})
    with st.chat_message("user"):
        st.markdown(prompt)

    # Generating the assistant's response
    client = OpenAI(api_key="your-api-key-here")  # API Key from Step 1
    stream = client.chat.completions.create(
        model=st.session_state["openai_model"],
        messages=[
            {"role": m["role"], "content": m["content"]}
            for m in st.session_state.messages
        ],
        stream=True,
    )
    with st.chat_message("assistant"):
        response = st.write_stream(stream)
    st.session_state.messages.append({"role": "assistant", "content": response})
What’s new?
- We’ve imported the
OpenAIlibrary and initialized the OpenAI client. - The app now sends user messages to the OpenAI API and streams the assistant’s response back to the user.
- Replace
"your-api-key-here"with your actual OpenAI API key.
3. Add API Key Input for Security
We can actually stop here, but to avoid incurring unknown costs, instead of hardcoding the API key, I’d like my app to take this API key as input whenever I want to use it.
from openai import OpenAI
import streamlit as st

# Set up the app title
st.title("My Custom ChatGPT Plus")

# Initializing session state for the OpenAI model, messages, and API key
if "openai_model" not in st.session_state:
    st.session_state["openai_model"] = "gpt-4"

if "messages" not in st.session_state:
    st.session_state.messages = []

if 'api_key' not in st.session_state:
    st.session_state.api_key = ''

# Display previous messages
for message in st.session_state.messages:
    with st.chat_message(message["role"]):
        st.markdown(message["content"])

# Input for OpenAI API key
if st.session_state.api_key == '':
    st.session_state.api_key = st.text_input("Enter your OpenAI API key:", type="password")
    if st.button("Set API Key"):
        st.session_state.api_key_set = True
        st.success("API key set successfully!")
else:
    # Initialize OpenAI client
    client = OpenAI(api_key=st.session_state.api_key)

    # Add a chat input box
    if prompt := st.chat_input("Please enter your query here..."):
        st.session_state.messages.append({"role": "user", "content": prompt})
        with st.chat_message("user"):
            st.markdown(prompt)

        # Generate the assistant's response
        stream = client.chat.completions.create(
            model=st.session_state["openai_model"],
            messages=[
                {"role": m["role"], "content": m["content"]}
                for m in st.session_state.messages
            ],
            stream=True,
        )
        with st.chat_message("assistant"):
            response = st.write_stream(stream)
        st.session_state.messages.append({"role": "assistant", "content": response})
What’s added new here?
- We’ve added a secure input field for the OpenAI API key using
st.text_inputwithtype="password". - The app only initializes the OpenAI client and starts the chat functionality after the API key is set.
That’s it — We’re done! To run the application on your terminal:
streamlit run app.pyWe can always keep this app on the local machine, but deploying it to the cloud means we can access it from anywhere. So that’s what we’ll do next.
Step 03: Deploying My Own ChatGPT Plus to the Cloud
Streamlit Sharing is a free and easy-to-use platform for deploying Streamlit apps. It allows you to host your app online and access it from anywhere.
- Push Your Code to GitHub: Upload your
app.pyfile and any dependencies to a GitHub repository. - Sign Up for Streamlit Sharing: Visit Streamlit Sharing and connect your GitHub account.
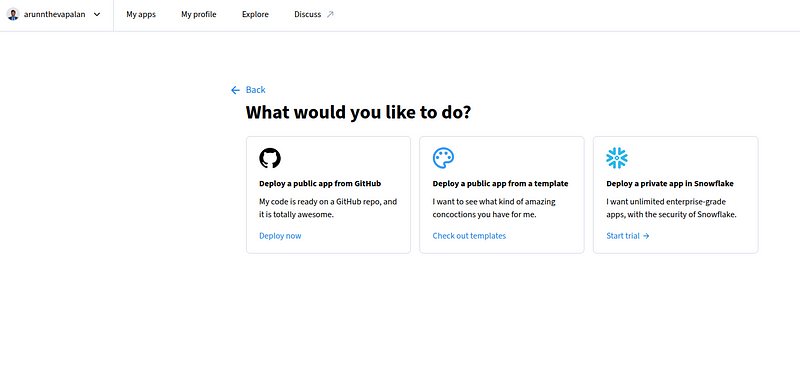
- Deploy Your App: As shown above, click on “Create App”, and select the Github option. Select your repository, choose the branch, and click “Deploy.”
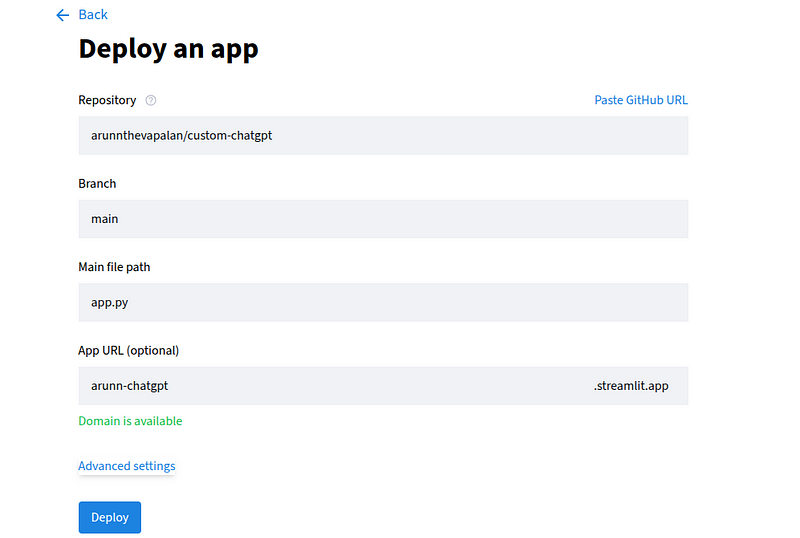
Streamlit Sharing will handle the rest, providing you with a public URL for your app. Here’s mine.
Initially, it will look like this:
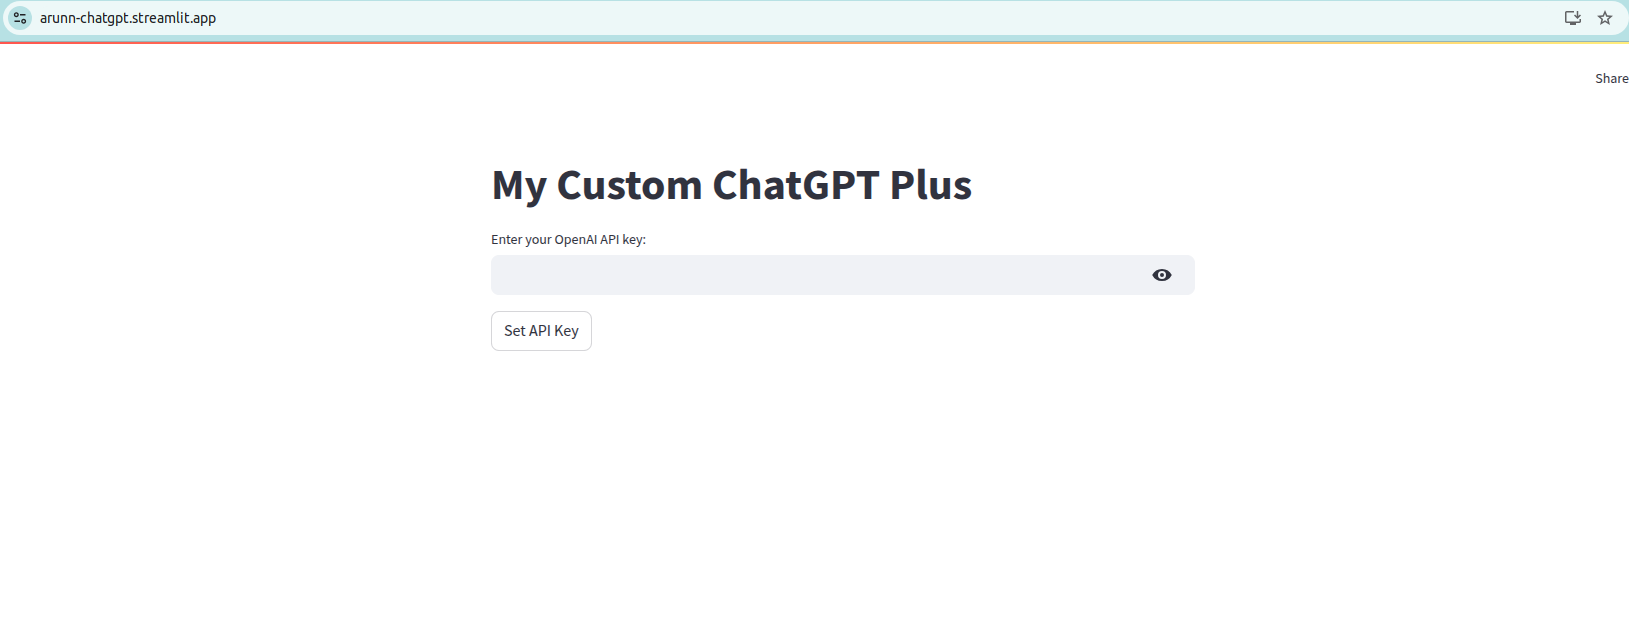
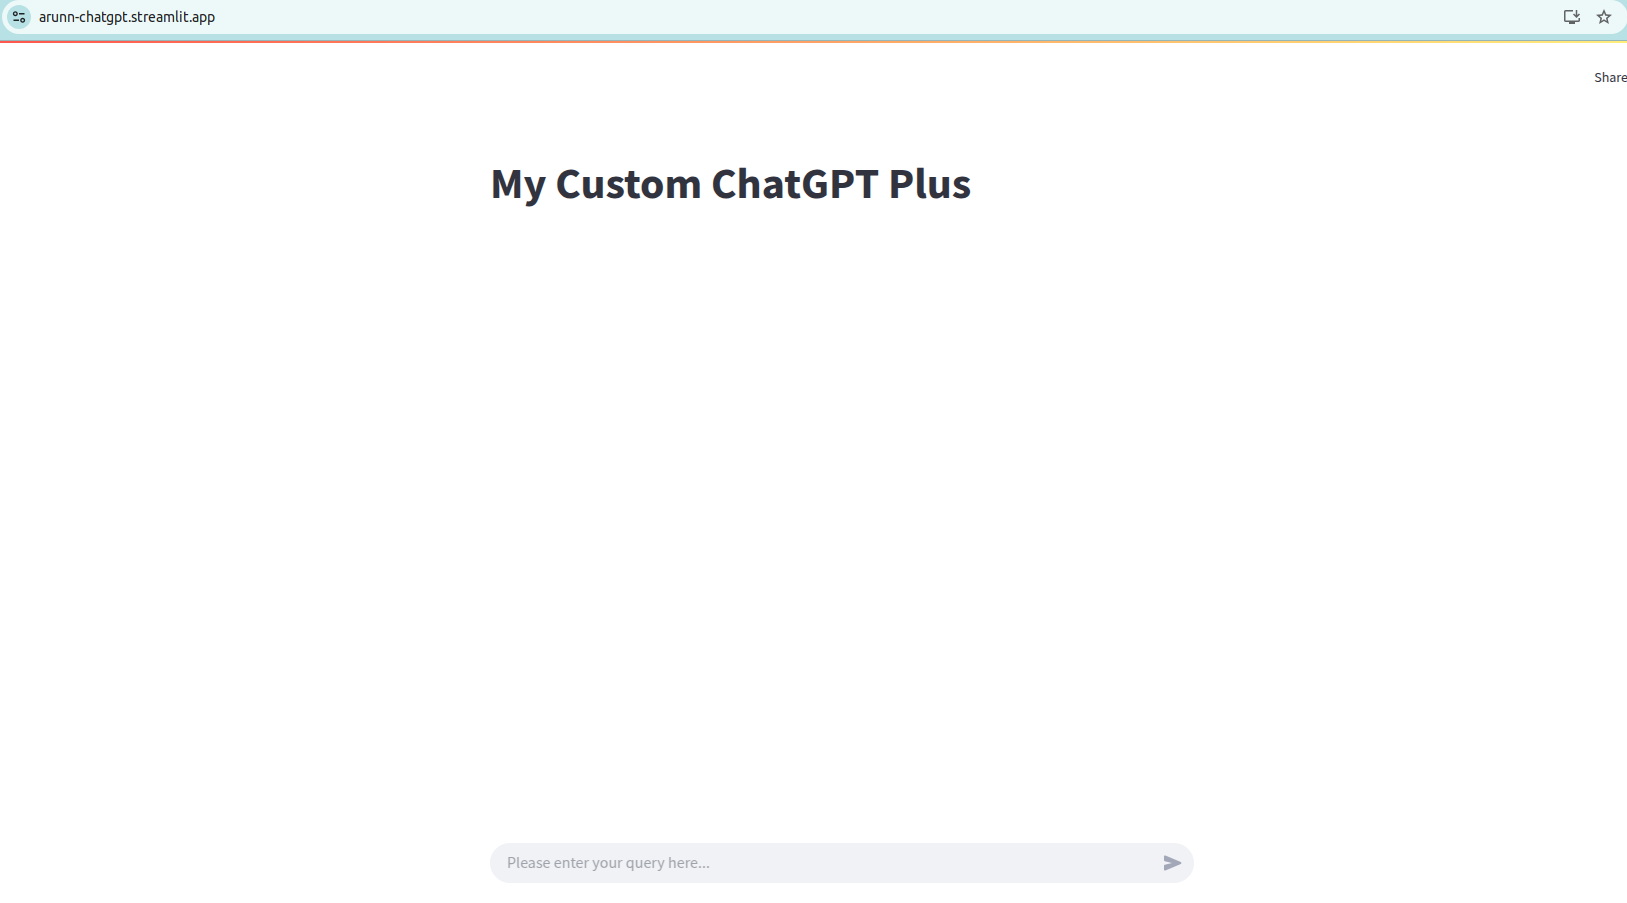
Once you provide and validate the API key, the chatgpt-like interface is presented for you to interact with the application.
You could also add this project to your data science & AI portfolio of projects and can easily share the link.
Final Thoughts
Congratulations! You’ve just built and deployed your own ChatGPT-like app. This project is an excellent introduction to working with LLMs and web development.
If you’ve made it this far, thank you for reading! I hope this tutorial has inspired you to explore more projects in the world of LLMs and AI.
Happy coding!
For more helpful insights on breaking into data science, honest experiences, and learnings, consider joining my private list of email friends.