How I Build Machine Learning Apps in Hours
In hours, not days. Do we even have a choice?

Wrapping ML models into apps in hours is no more a big deal. If you know Python, trust me, you know Streamlit. If you know Streamlit, trust me, you can do it too.
I’m going to tell you precisely how I did and walk you through a real-world example. Stay with me till the end, and you’ll be amazed at how much you’ll learn in such a short time. Let’s roll!
Why Build ML Apps
The awesome machine learning project (say) you and I just built on Jupyter Notebooks, nobody will use it. Sure, if we accompany a good README file in our GitHub repository and write a blog post on it, people would check it out, but still, nobody is going to use it. It’s sad, but also reality.
Unless…
Unless you and I convince them to use it by lowering the barriers as much as possible. Demos, documentation, tutorials, you name it. Still, nothing is as effective as letting the users check out a machine learning web app by themselves, interact with the application, feed input, and be amazed by the output. That’s the real win.
I didn’t just discover it overnight. I learned it with experience. A little about me here would serve the purpose. I am a Machine Learning Engineer in an AI startup. My daily work mostly revolves around researching, prototyping, and delivering machine learning solutions for various business problems. You might think that’s the hard part; no, machine learning is my art, and I enjoy acing it. The hardest part is to convince. First, convincing the internal decision-makers that this solution would work, and second, convincing (potential) clients. The struggle is real, my friend.
Communication is one of the most important skills for any role in the data science world. After trying numerous techniques around presentations, simulations, and more, in terms of effectiveness, one thing stood out—the Machine Learning (Web) App.
I believe it has something to do with letting the decision-maker see the “magic” themselves.
Streamlit to the rescue
For most projects I’ve worked on, I often spend sufficient time researching, building, and optimizing my machine learning solution, not to mention the time it takes to pre-process and clean the data. Naturally, in the end, there’s no time left to build a presentation worthy demo or anything of that sort. So when I had less than a day left to demo one of the recent projects (not allowed to disclose much about the project yet!) I worked on; I ended up checking out my luck with Flask, Dash, and so on until I stumbled upon Streamlit.
I had only a few hours to figure out Streamlit, so I didn’t have a choice but to type these two commands on my terminal.pip install streamlit
streamlit hello
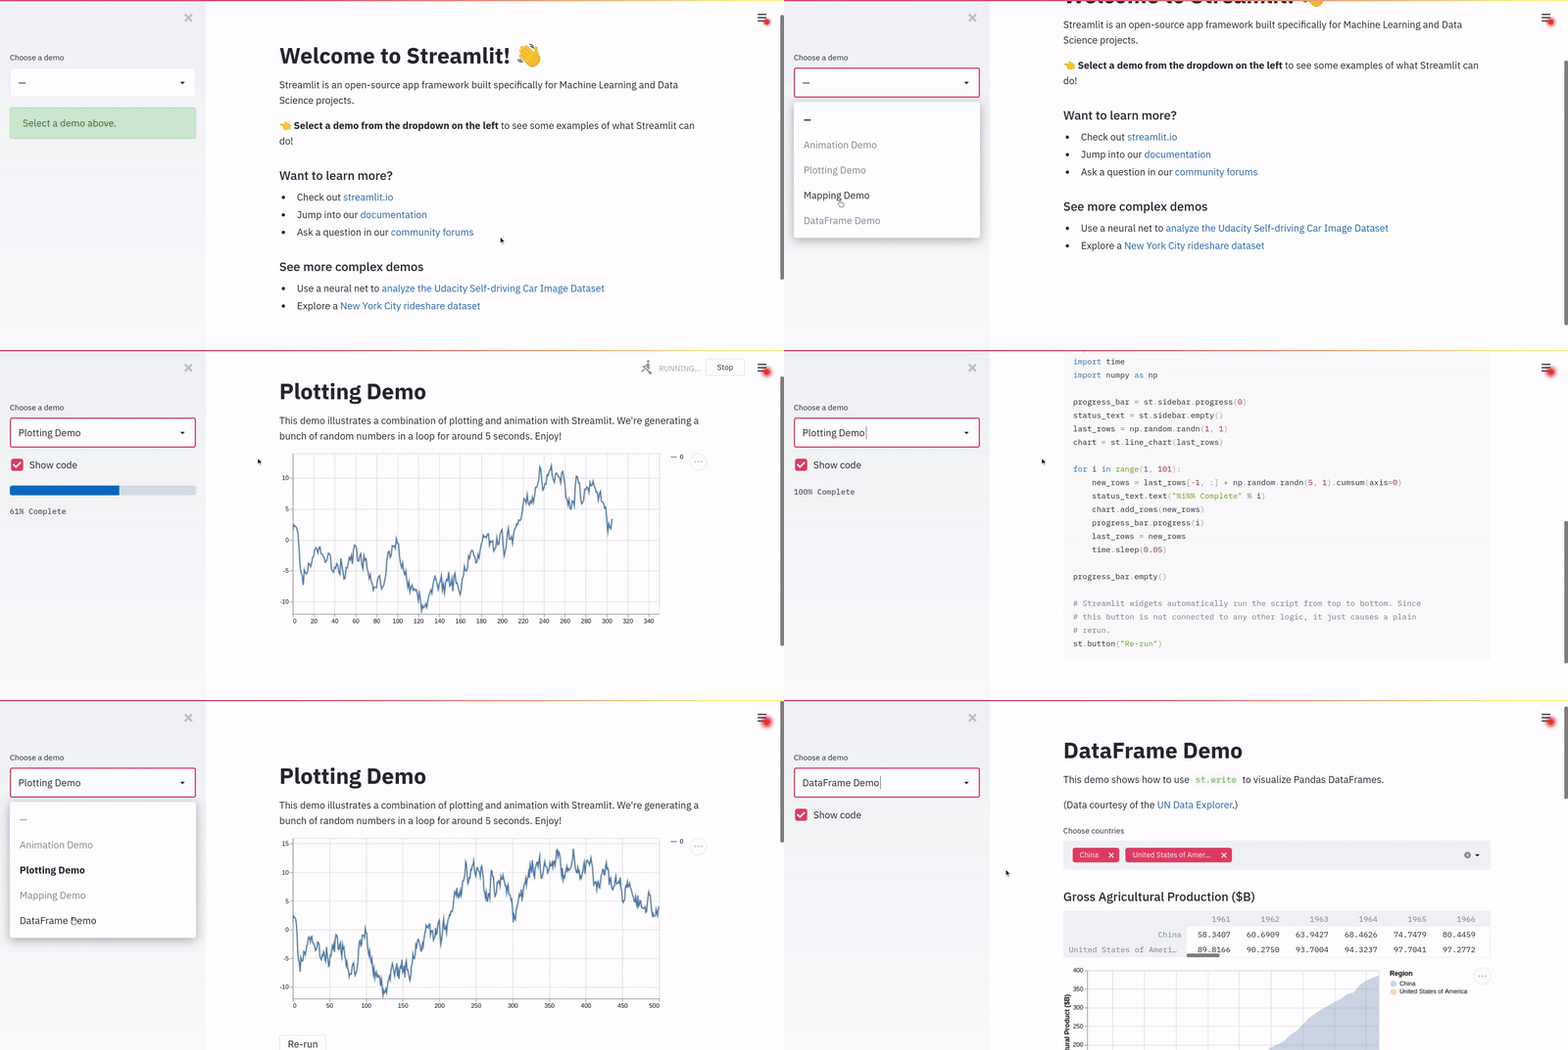
And this is what I saw.

I was truly amazed, and I had hope. I knew I could build the app before my deadline (Spoiler: I built it in no time!). I wish I could show you exactly what I ended up building with Streamlit. Still, since I probably am not allowed to, I’ve decided to build a similar model for a real-world use-case of diabetes prediction and quickly wrap it into a Streamlit web app.
Real-world Example: Diabetes Prediction
Diabetes is a chronic condition resulting from abnormally high blood glucose and is common across all age groups. Early detection and treatment of diabetes is an important step toward keeping people with diabetes healthy. Serious complications like kidney failure, blindness, limb amputations, and heart diseases can be avoided to a great extent by treating diabetes early.

The data for the following example is originally from the National Institute of Diabetes and Digestive and Kidney Diseases and is available on Kaggle. The data contains information on females at least 21 years old of Pima Indian heritage. You can refer to this GitHub repository to follow alongside the codes of the example.
Step 1: Pre-processing
The first step of any machine learning problem is to analyze and explore the data. The fastest way to do that is by using pandas-profiling (I’ll definitely write about this super-useful package, someday. UPDATE: I did, and here’s more). With a quick exploration, we can notice that though there were no missing values, considerable zeros exist for variables like blood pressure, skin thickness, glucose levels, BMI, and insulin levels, which don't make sense. So we do a simple imputation with the median for these variables after grouping by the target variable.
We also scale the features using a StandardScaler to maintain the range and significance between numeric variables. We can definitely pre-process and transform more to create more relevant features; however, our focus is to demonstrate a quick end-to-end pipeline that can be further improved later.
Step 2: Training
The code above is nothing fancy and is self-explanatory. We did an 80–20 train-test split and fit a Random Forest Classifier. Using scikit-learn’s classification report, we evaluated our model's performance and got a weighted F1 score of 0.88, which is pretty decent.
Step 3: Inference
By now, we have built a working model that serves predictions for the input data. We take the input during inference, perform the same pre-processing and transformations, and make predictions using the model we already built. The output is either “This is a healthy person” or “This person has high chances of having diabetes.” That solves a basic machine learning problem.
Quickly wrapping into a Streamlit App
It’s time to transform the amazing model of ours into a machine learning web application. As promised, this is only going to you take a few hours. I’ve simplified the approach into 6 baby steps so you could follow along too.

Step 0: Use a Streamlit template
This is an easy starting point. Almost all apps need a title, a brief description of what it does, and an attractive image. And needless to say, this part of the code is reusable with little modification across projects. We use functions such as st.title(), st.write() and st.image() which are self-explanatory. You’ll eventually get the hang of this template.
Step 1: Refactor the code
If you’re following clean code principles, this should be easy. We need our complete pipeline to have pure functions so that we can feed input and obtain the output as explained in our further steps.
It’s also important to identify what parts of the code are needed for the app. In our diabetes prediction example, the preprocessing or the training phases are one-time operations and are not needed for the app. What we could do is to load the trained model and perform inference on the input. The refactored inference code is as follows,
Step 2: Receive user input
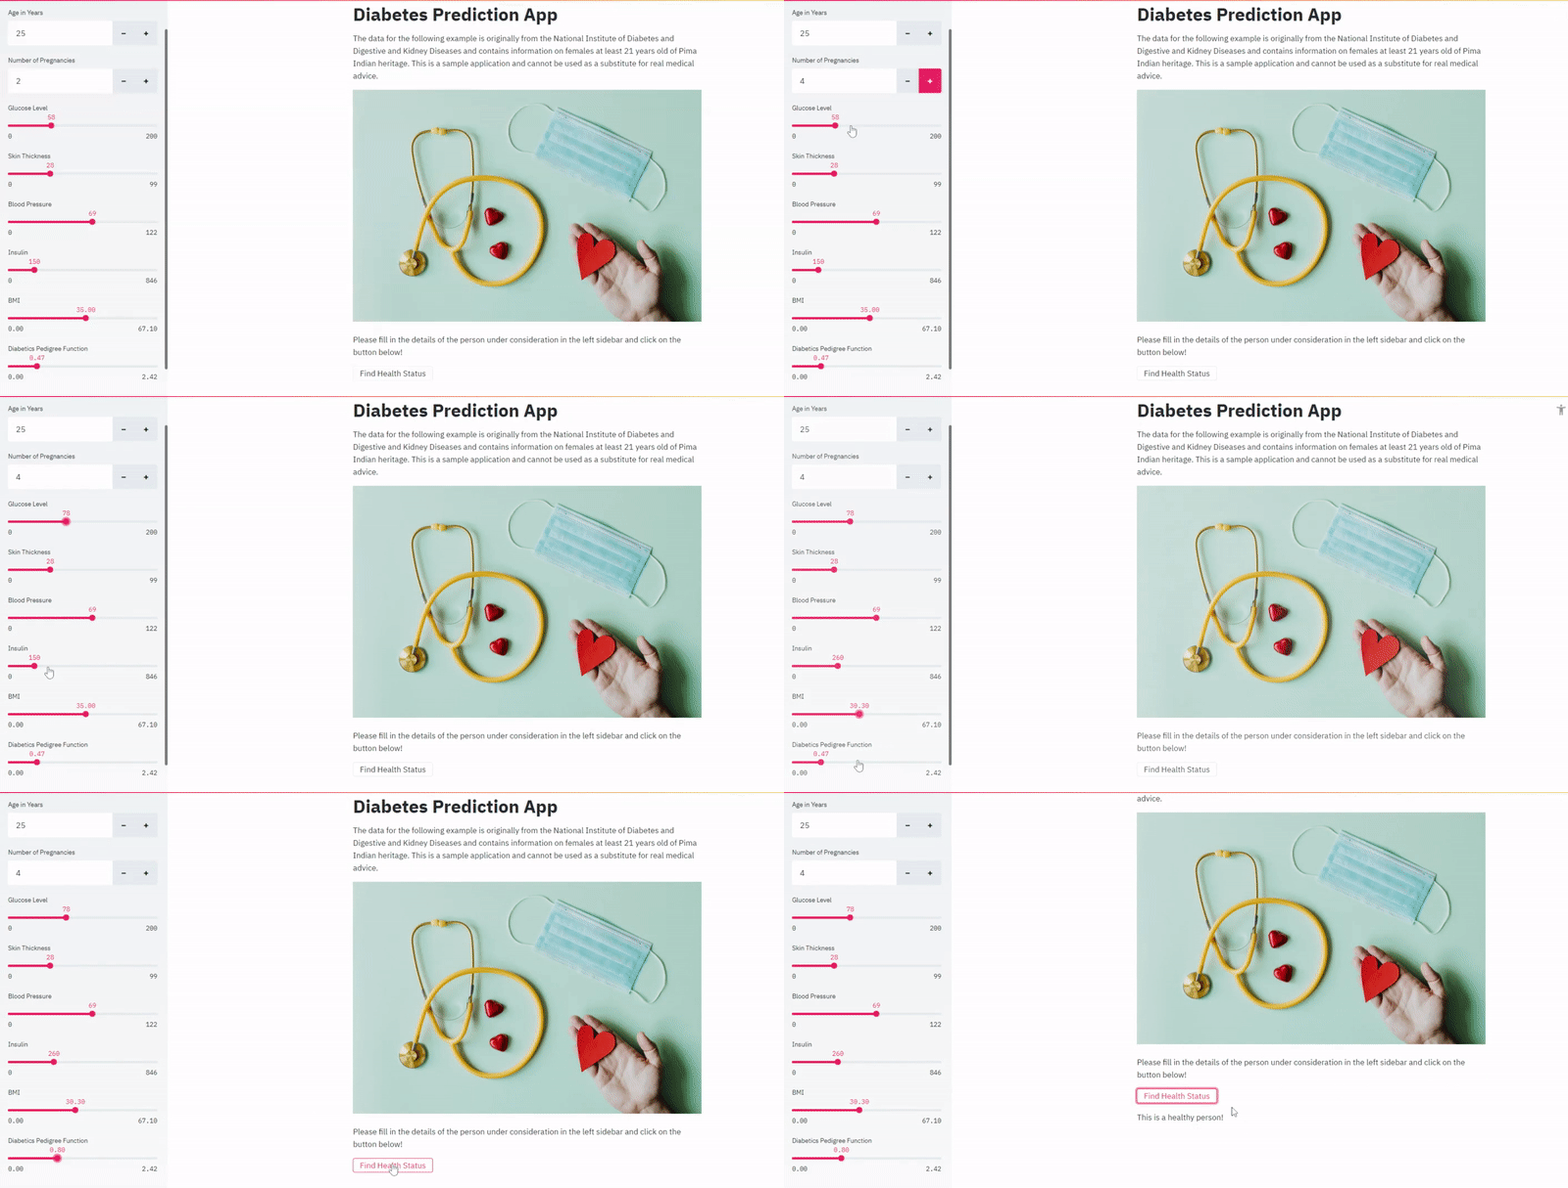
Streamlit provides a variety of widgets to receive the input from the user. In this example, we found the numerical number input i.e.st.number_input and sliders i.e.st.slider() to be appropriate. In addition to these, checkboxes, radio buttons, multi-select boxes, and more can be used based on the requirements. These functions are simple to use, and more can be found in the official documentation here.
I also like to organize all my inputs in the sidebar using st.sidebar.<function> and keep the main section for title, descriptions, and outputs. This was a personal choice, and do feel free to explore your options!
Step 3: Run the pipelines
Streamlit has simplified this process where the machine learning pipeline can be executed based on a trigger. The trigger used here is a button created using st.button()that the user is required to click once. The pure functions we created earlier are executed step by step.
Step 4: Display the output
This example features a line of output that could be displayed using a simple st.write() statement (and is added to the step 3 code). However, it is important to pay attention to this step when we have something more advanced like images, audio, tables, or graphs to display. The Streamlit documentation has functions for all of these outputs and can be used accordingly.
Step 5: Optimize the app
It’s important to start optimizing as soon as you have built a decent app. There are many other features we can find out by digging into the documentation, but this cool ‘Streamlit Cache” feature is a must-know. It helps speed up the app by caching repetitive functions that don’t change between runs. You can read more about how Streamlit cache works here. In this example, we could cache our model without loading for every single run.
Please refer to this code that puts all the snippets above together into a machine learning app as app.py. Finally, type this line on your terminal and see the magic yourself!streamlit run app.py
As you would realize now, this was an example that was kept intentionally simple to show you how simple it is to get started with Streamlit. However, as you proceed to more advanced requirements, the official documentation and the official community forums would be super helpful.
Now that you know to build a machine learning app, the next step would be to dockerize it and deploy it. I recommend you look at this article where I continue this diabetes prediction app example and dockerize in 3 simple steps!
Final thoughts
In this blog post, we looked at why we need to build ML apps and why we need to know how to prototype them rapidly.
This is the sole reason why this article is so important to me.
Next, we had a real-world example of predicting if a patient has diabetes and built a machine-learning model. We then highlighted a step-by-step approach to wrap any machine learning model into a web application using Streamlit.
Getting started with Streamlit has made my workflow easy in terms of how fast and easily I could prototype the final product. And I can’t wait to see you give Streamlit a try!
This article is a part of my series on Machine Learning in Production:
- How I Build Machine Learning Apps in Hours
- How to Dockerize Any Machine Learning Application
- Deploying Your Machine Learning Apps in 2021
I hope you enjoyed reading as much as I enjoyed writing this for you. I write extensively about my learnings and experiences in data science here on Medium. Want to keep in touch? Join my private list of email friends.

